Approving Payments
When a payment is submitted that requires approval, you will see an entry in the list on indicating how many payments are awaiting approval.
Note: You can assign a specific target user profile to approve payments for each approval level. Only users associated with the selected profile will receive approval notifications. For assistance with setting up role-based payment approval workflows, please contact your account representative.
If your permissions allow it, you can also approve payments for affiliated (child) accounts. To book payments on behalf of an affiliate, see Booking Affiliate Payments.
Note: You can approve payments created by other users, but you cannot approve payments that you created or edited.
To approve a payment
- On , under , click or .
The screen displays all payments requiring approval before they can be processed. - If both regular payments and Fast Track Payments need to be approved, you will see two tabs - and . By default, the screen opens on the tab that corresponds to the you clicked.
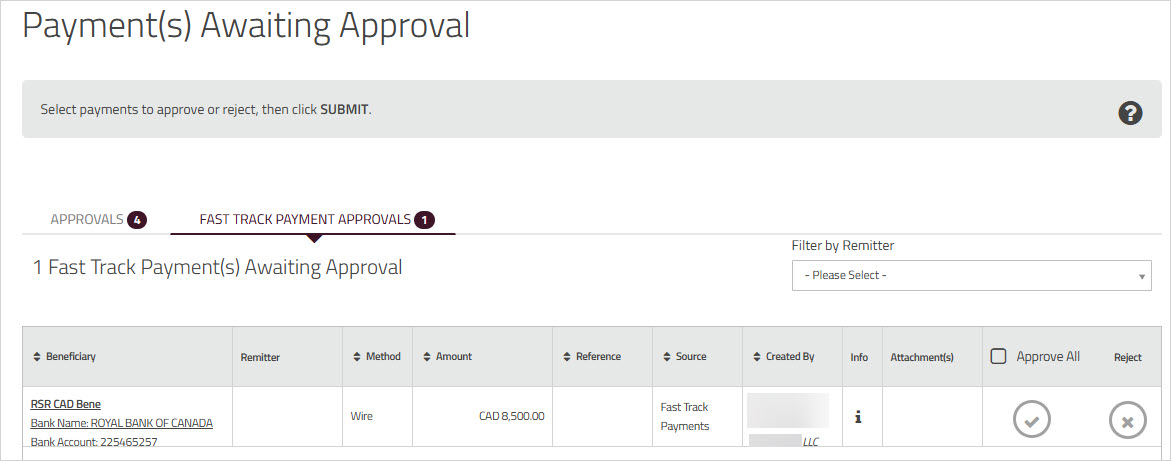
- You can either individually select the payments that you have permission to approve in the column or check the box next to to select all payments. You will see a
 green check beside each of the payments that are selected for approval.
 - The column identifies where the payment originated, such as Spot Trade, Make Payment, or Forward Drawdown.
- The column displays the details of the client that booked the payment, along with the date and time the payment was submitted.
- Use the filter to display payments for a specific affiliate. The grid displays only payments you are authorized to approve, based on the configured payment approval workflow.
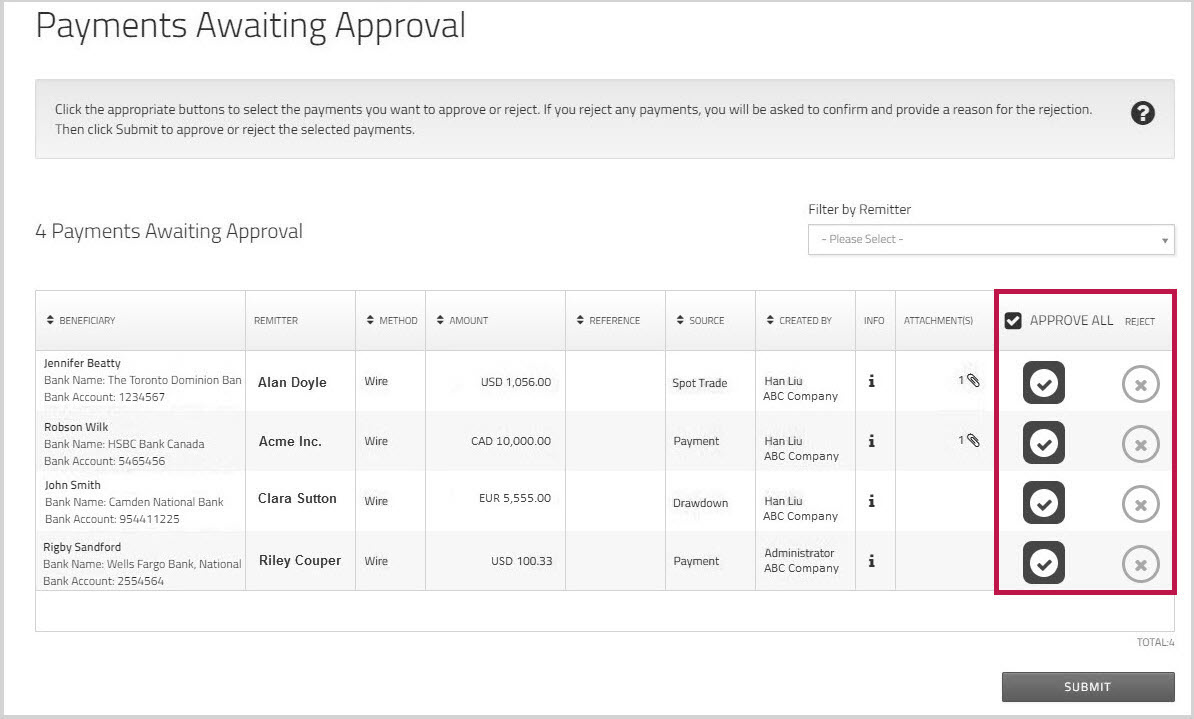
You cannot approve payments that you have entered or edited. In this case, you will see a note in the approval column that tells you that you cannot approve the payment. - If a payment includes attachments, you will see a paper clip icon in the column. Click the icon to view the files. Then, in the pop-up, click the attachment that you want to view.
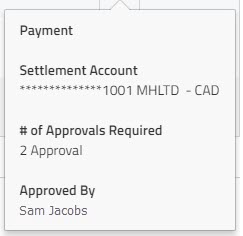
- To see additional information about a payment, click the number in the column. The number indicates the number of approvals associated with the payment. This number is based on the approval workflow, including the number of assigned approvers at each level. Click the number to open a pop-up dialog that will display the spot or forward order number and the settlement account details (as applicable for the payment) and the . For payments that require multiple approvals, and if the payment has already gone through approvals, the will display the client and user details of those who approved it and the number of approvals still remaining.
- Click the name in the column to view the payment details including the beneficiary, remitter, and settlement information. Click the print
 icon to export the payment details to PDF for sharing or approval. You can also view remitter details by clicking the name in the column.
 - If there are any payments that you do want to approve, click the check beside those payments. The check becomes grey
 to indicate that the payment is no longer selected and will not be approved.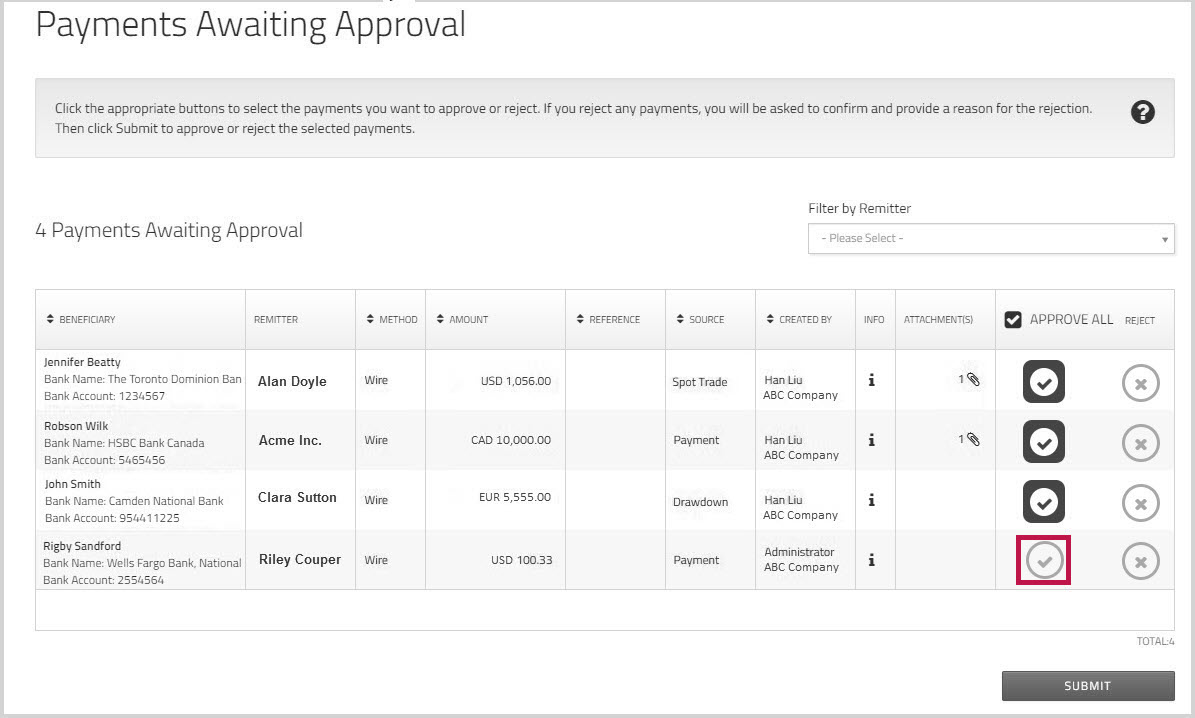
- Click to approve the selected payments.
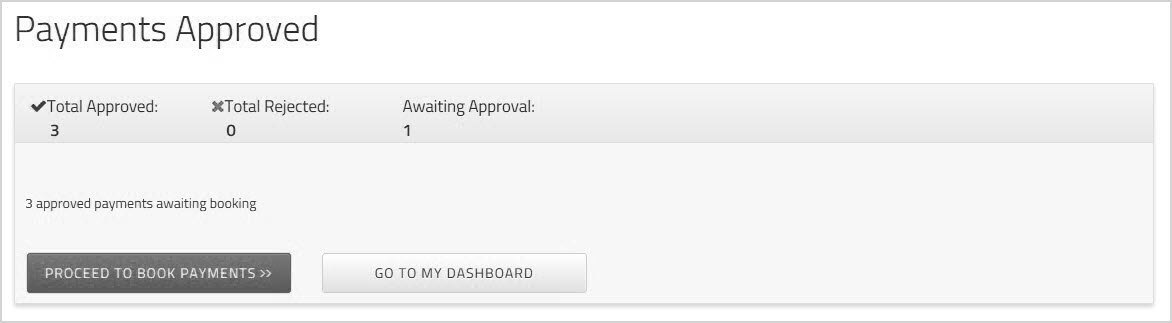
- The page indicates the number of payments that were approved, rejected, or awaiting approval. It also identifies if any payments require additional approvals (if multiple approvals are required). For information about rejecting payments, see Rejecting Payments. If you have approved any payments for your affiliates, you will see an option to view the affiliate payments. For more information, see Booking Affiliate Payments .
-
Users authorized to view and book affiliate payments, can operate and complete the booking on behalf of an affiliate.
-
If you have approved any payments for your affiliates, you will see an option to view the affiliate payments on the screen. Click .
Alternatively, on , under , click .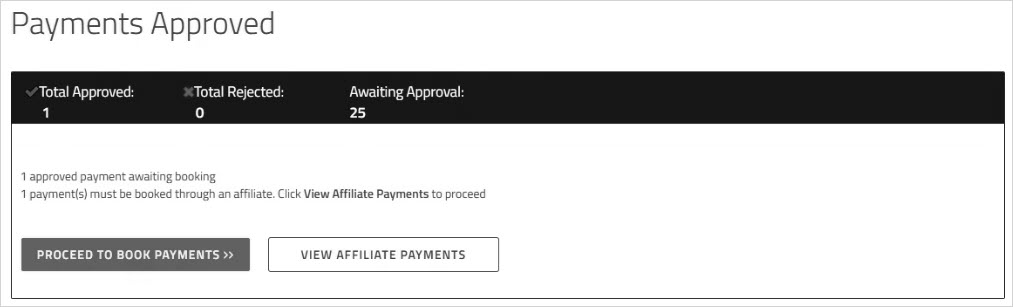
-
Selecting either option opens the window, allowing you to operate as an affiliate to complete the booking on behalf of your child entities.
-
In the column, click the link for to complete the booking.
Note: The link is enabled if you have the necessary permissions. To request access, contact your Admin.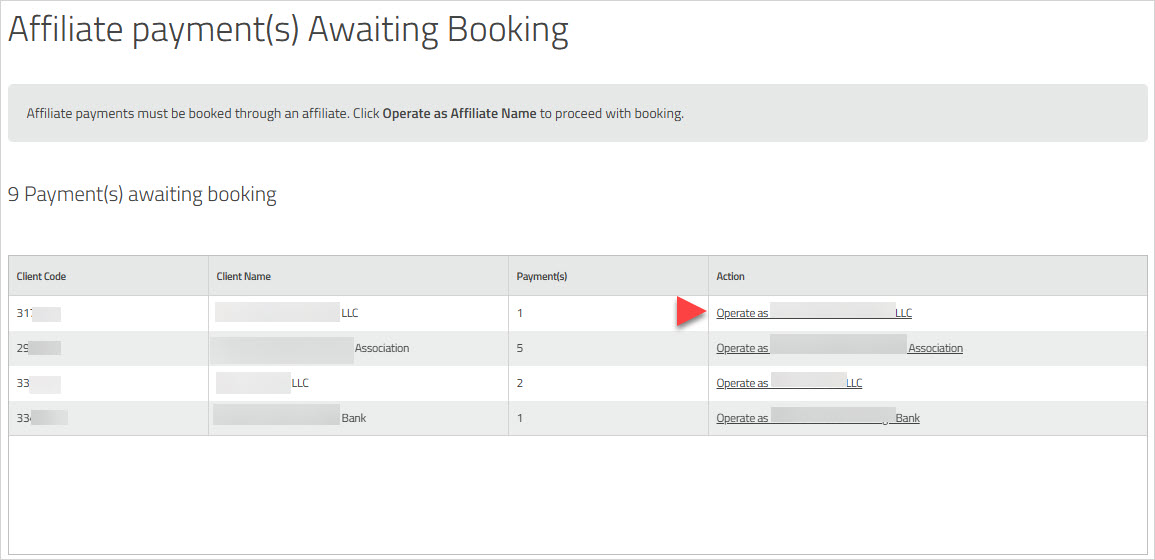
-
You will be redirected to the page where you can book payments on behalf of the selected affiliate. The banner at the top of the page shows the child account name under which you are now currently Operating as. To return to the parent account, click the in the banner.
-
To continue booking the payment, go to step 14 in this topic.
- If you have permission to book payments, click .
The window appears with the tab displayed. The payments that you approved are listed at the bottom of the page. The column displays a green check beside those payments that are ready to process.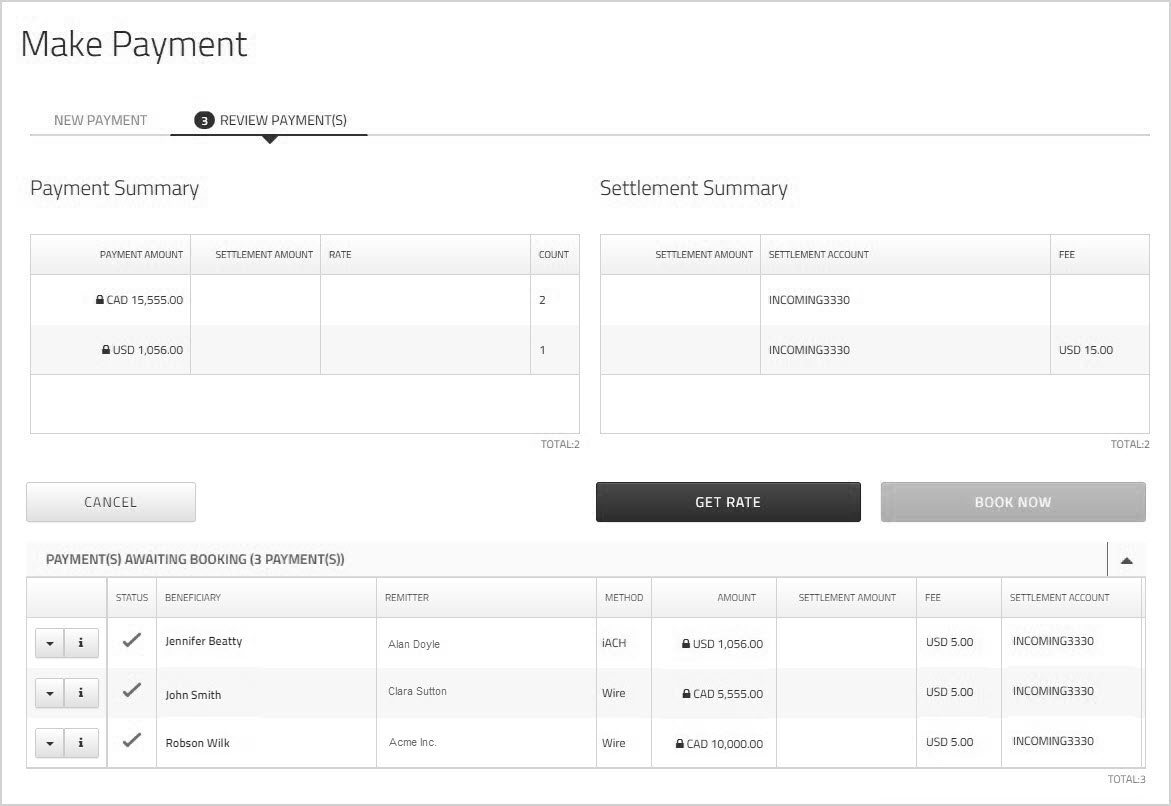
- Optionally, click the dropdown next to any payments you do not want to book at this time, and click . By default, all of the approved payments will be booked.
- To edit a payment, click the dropdown next to the payment, and click . Make the required changes in the tab and then click .
Note: Edited payments are again sent to the Approval queue. Another authorized user will have to approve this payment since you cannot approve payments that you have edited. - Click to get a live quote. The timer indicates the amount of time you have to book the deal at the displayed rates.
Note: If your account configuration requires you to authenticate via Multi-Factor Authentication, when you click , you will be prompted to select one of the authentication methods set up. For more information, see Multi-Factor Authentication.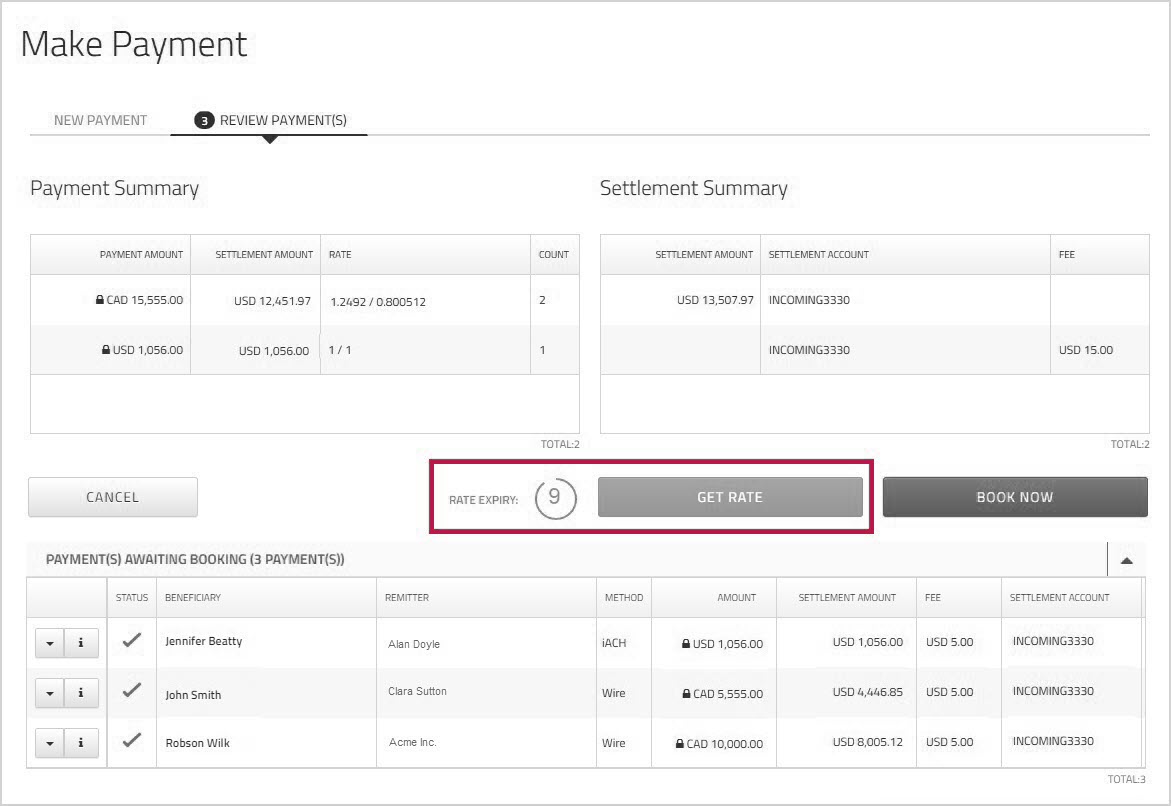
- Click to confirm the rates and book the payments.
A confirmation dialog appears to let you know your payments have been booked. - Click to display the Order Receipt.
 Booking Affiliate Payments